

Supplies:
· Wool Sweaters
· Embroidery Floss
· Needle
· Scissors
· Hoop
· Washing Machine
· Paper
· Painters Tape or Masking Tape
Directions:
1. Wash the wool sweaters in hot water with laundry detergent. The agitation of the washing machine will felt the wool together. Lay out to dry or if you would like the felting to be tighter dry the sweaters in the dryer.
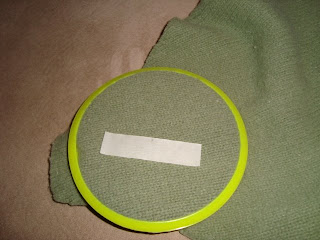
2. Cut a sleeve off of each sweater and cut along the seams to open up the arm. Place the hoop onto the sweater that you are going to embroidery on.
3. Cut a piece of tape 3” long and mark the middle (1 ½”) with a black pen. Place the tape onto the sweater in the hoop.
4. Use the tape as a measuring tool and straight edge and embroidery back stitch from end to end of the tape. You will have a straight line that is 3” long. Add a V at the ends of the 3”stitching. http://www.craftown.com/instruction/embroidery.htm
5. Turn the tape 45 degrees (Make sure the black mark is in the middle of the other 3” stitching.) and repeat step 4 three more times. (I added an extra V on every other 3” stitch.)
6. Cut a template out of the paper. (My coasters are 3 ¾” circles.)
7. TOP COASTER: Hold or pin the template on the area that you embroidered on and cut around the template.
8. BOTTOM COASTER: Cut another piece of wool from your template.
9. Blanket stitch around the bottom and top of the coaster. http://primrosedesign.blogspot.com/2006/11/stitch-school-blanket-stitch.html
10. You are finished! Great job! Try other embroidery patterns.


No comments:
Post a Comment